Saturday, March 26, 2011

ETC_Final Project

Relevant and Innovative Learning Scenario
By Lania Clark

1.     Target Audience – 4th-5th Grade Music Students (Public Cyber School)

2.     Materials
·       Webcam
·       Headset microphone
·       Homemade musical instrument (created during a previous lesson)
3.     Objectives
·       During the course of the project, the student will create a video presentation of his/her instrument invention.
·       During the course of the project, the student will evaluate a peer’s invention for design and functionality.
·       By the end of the unit, the student will be able to accurately categorize musical instruments by type: chordophone, idiophone, aerophone, membranophone.

4.     Procedure
Monday: Upload a picture of your instrument invention to your team Voicethread.  It can be a photograph or drawing.  If you want, you may label the parts of the instrument to show which materials were used.
Tuesday: Post a text or voice comment on each of your team member’s pages within Voicethread.  Try to guess which type of instrument he/she created.  Include your observations about the picture and why or why not you think it would fit into a particular category.
Wednesday: Create a video presentation of your instrument invention on your page in Voicethread.  This is your opportunity to practice your performance skills.  Smile and introduce yourself.  Tell the name of your invention and then demonstrate how it can be played.*
Thursday: Post a Peer Evaluation on each of your team members’ pages.  (This may be a text, video, or voice comment.)  Was his/her design successful?  Do you have any suggestions for improving the materials or design of the instrument?  If your guess about the “type” of instrument changed after hearing the performance, be sure to comment on it.  Your peer evaluation should be constructive criticism, as we’ve discussed many times this year.
Friday: Write a quick personal reflection.  In the submission box for this assignment, write down any thoughts you have about this project.  What was meaningful?  Would you do anything differently?   

*In a previous lesson, students were given guidance on the various ways they could perform their instrument, including repetitive rhythm patterns, short melodies or chord progressions, or as an accompaniment to a favorite song.  

5.     Web 2.0 Tool – Voicethread – a collaborative, multimedia slideshow that allows students to comment and voice their opinions through text, voice, or video. 

6.     Social Participation/Social Learning – Online learners will discuss their instrument inventions. Collaboratively, they will evaluate one another’s projects and determine which category each team member’s instrument falls into.  It’s probable that the discussions will lead to refining their designs, or the manner in which the instrument is played.

7.     Making Connections – This project comes within the context of a larger unit on sound production.  Students will have had previous experience with the various ways instruments produce sound, and this project will give them the opportunity to construct and solidify their knowledge as a team.  The real world application will center on the concept of “product design,” as students become familiar with the process of evaluating an item for functionality as well as aesthetics.  In our live chat sessions, we will talk about why certain musical instruments become popular as it relates to product design.      

8.     Create/Produce - The team Voicethread will contain each member’s project, as well as the discussions and evaluations by peers.  There is also the potential for this project to extend for another week.  Each team could vote on the strongest instrument invention within their group.  The teams could create a new Voicethread as an advertisement for the chosen instrument.  These threads could be posted in a community space where the entire class could vote on the strongest presentation.

9.     Assessment – The attached rubric will be used by the teacher to score each step of the project, as well as provide written feedback.
    
10. Reflection
·       Students - In addition to the reflective process that is built into the Voicethread project, students will offer a brief written reflection at the end of the week. 
·       Teacher - Each team’s Voicethread will provide a coherent package of student interaction and learning.  At the conclusion of the project, it will be valuable to compare the different threads, looking for behaviors that lead to successful teamwork and depth of understanding of the concepts. 

Implementation Video
 

Saturday, March 19, 2011

PE5_VoiceThread

More Practical Experience with VoiceThread

Teacher Challenge #2:
Ok, on to my second hurdle – the numbers.  I would like to use this with my 4th-5th grade music class.  I have 186 students.  I’ve talked to other educators who have used VoiceThread and the word on the street is that practically speaking, you shouldn’t get more than 20 students commenting on a thread.  I plan on dividing up my class into team of about 15.  Each team will need a separate thread.  Yikes!  It’s a good thing I’m checking into all this.  My free Voicethread account will only allow me to create 3 threads.  It’s too late in the school year to beg for an educator’s account, so I think I will pay for the “Pro” account for one month, which will allow me to set up unlimited threads.  It will allow me to export the threads into a movie format.  Perfect.  Now I’ll have a packaged example to show administrators…Oh, the art of persuasion.


Teacher Challenge # 3:
The third challenge will certainly be the settings for this Web 2.0 tool.  It’s pretty straightforward, but I think I better do a couple test runs after I’ve purchased the Pro account.  For now, I’ll make up a mock example of how I think a team’s thread will look during the first and second steps of the project. (Upload a picture of your instrument, begin commenting on your teammates pictures - Which type of instrument do you think it is and why?) 


As far as settings go, I plan on selecting “moderate comments” so that I can act as a human filter for my students.  I don’t like that it will slow down their interaction, but I think it’s wise in this environment.

PE4_VoiceThread


Practical Experience with VoiceThread 
In my Emergent Technologies in a Collaborative Culture class, we are going to be creating a “Relevant & Innovative Learning Scenario.”  I’ve decided to let my students use VoiceThread as a presentation and evaluation medium for this scenario.

Here’s the basic plan for the project:
1 – Students are designing and building their own homemade instruments.
2 – Small teams of 4-5 students will participate on a Voicethread to document the learning process.
3 – Each child will post a picture & video demonstration of his/her instrument.
4 – Students will use the “commenting” feature in Voicethread to discuss their projects and evaluate one another’s designs.

Teacher Challenge #1:
It’s important that I get more practice with the Voicethread platform so that I can figure out solutions to the problems that will inevitably arise.  My first fear is that they will have difficulty with the video commenting.  I’m operating on a Mac with built in camera/mic, while my kids are on PC’s with headsets and external webcams.  

It's hard enough to get the equipment to function during our live chats...
So, I did a quick test with the student equipment...and it worked fine!  Hurrah! 

(Note the Thumbs up in the video comment.)


My Project Rubric:

Sunday, March 13, 2011

BP7_VoiceThreadCommercial

BP6_VideoEdits


My Comments on Video Editing
A colleague posted some helpful tips about editing in iMovie.
Click on the image above to read her blog and my comments.

BP5_Little Bird Tales

My Comments on a Web 2.0 Tool Review
A colleague posted an excellent review of the Web 2.0 tool, "Little Bird Tales" on her site. 
Click on the image above to read her blog and my comments.

Saturday, March 12, 2011

BP4_Exploratree


Why use Exploratree?
Exploratree is a tool to guide students through the thinking process.  As educators, our task is often to move students beyond the lower levels of Bloom’s Taxonomy into higher-level critical thinking.  This Web 2.0 tool contains a library of template maps.  Each and every one is customizable, and there’s also the option to build a map from scratch.


The platform is fairly flexible.  It’s possible to upload pictures and insert hyperlinks to other media or websites.  It functions similarly to Prezi, in that the white space can zoom in or out.  One of my favorite features is the sequencing tool.  You can design a template that prompts students complete it in steps.  Scaffolding is important, especially if the assignment centers on a complex topic.  Sequencing is also helpful in presentation mode, as you can reveal information layer by layer for your audience.

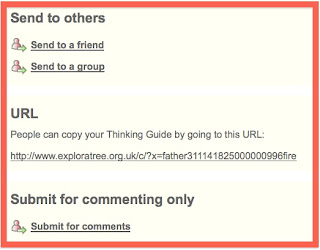
“Sending” vs. “Sharing”
Exploratree has a couple of share options.  1) You can “Send” your thinking guide to a friend or group.  This allows them to view and edit your guide.  2) The other option is to “Submit for Commenting Only”.  The viewers will not be able to edit it, but can make comments.  3) The “Share” option is for collaboration.  If you “share” it with a friend or group, they can all participate in building the thinking guide.


Quick Facts
Pros:
Excellent library of pre-made templates, customizable, various possibilities for collaboration, educationally sound.
Cons:
A little bit tedious to learn the formatting tools, no ability to publish a “final page to the web” (without editing options), does not appear to offer synchronous collaboration the way Google docs does. 

See My Example
Here’s a test map that I set up.  The intent of this map to help students relate to a topic personally, then expand to think about its local and global affects.   Click on the image.

PE3_iMovie


iMovie ’11 Essential Training (3)
The end of Section 7 includes a segment on “Editing to the Beat”.  Who would have thought that one could create beat points simply by listening to the music and typing the “m” key in time with the music?  I really like that.  

An Example of "Beat Markers"


You’ll see a quick test I made below, using this technique.  I ran into some difficulty the first time through, when I didn’t add enough pictures.  It seems like there’s not much room for re-ordering photos or clips once they’ve been set to the beat points.  Probably my inexperience holding me back.  I’m sure this will improve with practice and further experimentation.  


Valentine's Day 2011
Longwood Gardens, PA
Here's what I ended up with:


Hmm... I am still trying to figure out why it's such poor picture quality.  I've tried exporting various sizes, and changed it from a "Widescreen project" to a "Standard project'.  Still no luck.  Any suggestions?


 I've Completed the Training!  

PE2_iMovie


iMovie ’11 Essential Training (2)
I’ve covered a few more sections of the training.  Section 7 involves audio, and I was looking forward to learning more.  Well, the tutorial fellow got me all excited when he demonstrated how you could set equal volume levels across multiple clips.  It’s so beautifully simple!  This feature will save a lot of time on group video projects, where each person contributes a portion and one person combines all the clips.  I happily opened an old project to try this new technique.  Much to my dismay, I couldn’t get that “audio wave form button” to display!  Oh, sadness. 

All my advanced tools are displaying, but not the magic button.   
Here’s a screenshot of my predicament:


Does anyone have a solution?   


This is how it displayed in the tutorial:

PE1_iMovie


iMovie ’11 Essential Training (1)
Section 4 was all about organizing your footage and projects.  Up until this point, iMovie’s methods of saving and creating “events” were a bit of a mystery to me.  I was muddling through, at best.  Now I feel like I have a better understanding.  The “Event Library” allows you to organize, rate, and store clips.  I really like the ability to mark your footage as good and usable, in their words “favorite”.  It can save time during the editing process if you have a lot of clips to go through.  See the screenshot below to see how I marked a clip.


The “Project Library” is essentially a folder for all of your edited projects.  You never need to click “Save As” in iMovie, because the program has a built in auto-save feature. (This freaked me out at first!)  Within the project library, it’s possible to duplicate a project and re-edit it.  (Say if you want to create a long & short version of the same movie.)

I went ahead and trashed any unimportant projects and renamed some to be more organized.  I’m turning over a new leaf in iMovie! 


*iMovie Fun Fact – this program doesn’t have it’s own trashing system.  It sends discarded files to your hard drive’s trash bucket.

*My Progress  - Completed through Section 4


Saturday, March 5, 2011

BP2_VoiceThread


Why Choose VoiceThread?
Voicethread is a multimedia collaboration tool.  Its flexible design and various security options make this an excellent choice for K-12 educators.  Teachers can set up a discussion based around an image, audio, or video, or they can allow students to construct the body of the thread themselves. 

What is the Sample Below?
My 4th-5th grade students will be building an “Instrument Invention” later in the school year.   I intend to use Voicethread as a platform for them to “show & tell” about their instrument.  They will also be required to record a short performance demonstration, and provide constructive feedback for a classmate.  The sample will give you an idea of the kind of collaboration that could take place.  (These are fake “students” for the sake of my cheesy sample.) 


Quick Facts 
Pros
           - 5 Methods of Commenting - video, microphone, telephone, audio file, or text
           - 2 Share methods – link or embed code
           - Comment Moderation – teachers can act as a “human filter” if desired
           - 3 Privacy Options – threads can be public, restricted to those who have the link, or restricted further to only include people whose names you’ve selected
           - Endless Creative Uses!

            Cons
              Grading – could become unmanageable for large classes
              External Linking – potential safety issue for young, independent online students
                My Personal Challenges for Implementation:

                Class Size – Realistically, small groups are more effective.  A single Voicethread can contain “thousands” of comments, but for classroom purposes 10-15 students is more manageable.  My 4th-5th grade class alone is 188 students.  I have no choice but to assign smaller groups and create separate threads for each one.  Talk about administrative hurdles!

                Proper Use – I will need to coach my students on where and how to comment, as well as why they should not follow the “external linking” without parental guidance.  I haven’t seen any questionable content on the public threads…but I don’t feel like getting my head chopped off because of a child’s natural curiosity. 

                Additional Note for Educators:
                There is a K-12 Voicethread account for educators, which narrows the “public” threads down to content that has been approved by teachers.  The cost is roughly $1 per user.      


                Thursday, March 3, 2011

                BP3_iGoogleScreenShots

                Here's how I set up my "Personal Learning Environment"
                Admittedly... I was resistant at first!  (I'm pretty attached to my Firefox Bookmarks Toolbar.)  However, I have quickly seen the error of my ways and am already loving the fast access.  Now I never have to fear running out of room on ye olde toolbar...


                HOME

                FSO

                CBR

                ETC

                The "To Do" lists are another favorite addition.  Thank you Ms. Hanaway for helping us get organized.  I think this is going to set us up for success through the whole EMDT program.

                Monday, February 28, 2011

                BP1_Welcome to My Blog

                 copyright free image by Dreamstine

                Teaching Elementary Music Online
                (Who would have thought?)

                The elementary music classroom is a place for exploration.  We're always listening, dancing, interpreting, reading, playing, and creating music.  Today was no different, as I met with my 2nd and 3rd grade students in our "live" chat room.  We took the opportunity to explore our own voices through this simple composition project:

                1) Choose 4 measures and arrange a short melody
                2) Practice singing your composition
                (student sample) 
                 
                I was really impressed with their progress!  It takes a little moxie for some students to sing in public (over the headset microphone), but they have made tremendous strides.  Furthermore, they are actually reading what they see on the staff...I couldn't be happier.  There is something powerful about being able to do something that many adults can't do!

                Welcome to the world of elementary music online.  If you're a music teacher, the above scenario may not be much different from your everyday experience.  The difference here, is that it's made possible through technology.  My students don't come to a physical school building.  They access public education in their own homes.  Aha!  And here we have the point of this blog...It's an investigation into the use of technology in the elementary music setting.  Curious?  Keep reading!